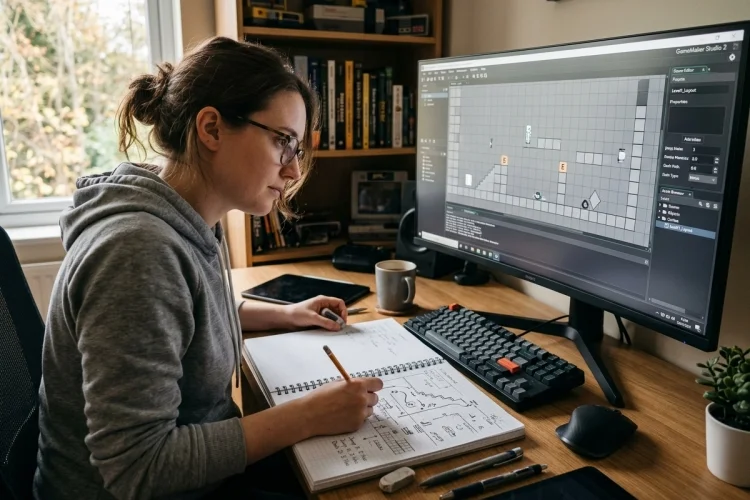
Opening GameMaker’s Room Editor and immediately placing platforms, enemies, and decorations can feel productive. However, without a clear plan, you may eventually discover that the level is confusing, unfair, too long, or simply not enjoyable.
Planning does not mean creating a huge design document before doing any practical work. It means deciding what the level should accomplish, which abilities the player will use, how the challenge will develop, and what information must be communicated visually.
A simple plan can save hours of rebuilding. It gives every platform, corridor, enemy, collectible, and checkpoint a reason to exist rather than filling the room with random content.
This guide explains how to plan a 2D game level before building it in GameMaker. You will learn how to define the level’s purpose, work with player metrics, sketch a readable layout, design the pacing, prepare a blockout, and test the experience before adding polished artwork.
Define the Purpose of the Level
Every level should have a clear purpose. It might introduce a movement ability, test an existing mechanic, tell part of the story, lead to a boss, or give the player a quieter space between difficult encounters.
Write the level’s main goal in one sentence. For example:
Teach the player how to use a dash while crossing increasingly dangerous gaps.
That sentence becomes a filter for your design decisions. A platform, enemy, or puzzle belongs in the level when it supports the dash mechanic or improves the intended experience. Unrelated ideas can be saved for another stage.
You should also define the player’s practical objective. Are they trying to reach an exit, collect three keys, rescue a character, defeat every enemy, or survive for a certain amount of time?
A clear objective makes it easier to organise the route and decide what information the player needs. Level-design planning commonly begins with goals, constraints, pacing, and the intended player experience rather than visual decoration.
List the Player’s Available Actions
A level can only challenge abilities the player already has or is about to learn. Write down the actions available at this point in the game, such as walking, jumping, dashing, climbing, attacking, pushing objects, or activating switches.
Next, choose one or two abilities that will receive the most attention. Trying to test every mechanic in one short level often creates a messy experience.
Imagine a platformer in which the player can run, jump, and wall jump. A wall-jump level could follow this sequence:
- Use one wall jump above safe ground.
- Climb between two close walls.
- Wall jump while avoiding a moving hazard.
- Combine wall jumping with an enemy encounter.
This structure introduces the skill, gives the player room to practise, and eventually tests it under pressure.
Do not introduce the hardest version immediately. Players need time to understand what a mechanic does before they can use it confidently in a complicated situation.
Establish Player Metrics and Level Scale
Player metrics are measurements that affect how the character moves through the environment. They include walking speed, jump height, jump distance, collision-mask size, dash range, and the dimensions of common platforms.
These values should influence the level from the beginning. If the player can jump 120 pixels horizontally, a 200-pixel gap is impossible unless another mechanic is involved.
Create a small test room before planning the full level. Measure comfortable jumps, maximum jumps, stopping distance, attack range, and the amount of space required to turn around.
Use those results to create simple rules. For example, ordinary gaps may be 64 pixels wide, challenging gaps 96 pixels, and maximum-risk gaps 112 pixels. Consistent measurements make the world feel predictable even when the difficulty increases.
Metrics help maintain a usable scale during blockout. When movement feels awkward, the problem may come from inconsistent dimensions rather than the player controls themselves.
Sketch the Route and Important Spaces
Draw a simple map on paper or in a basic graphics application. Rectangles can represent rooms or platforms, arrows can show movement, and symbols can mark enemies, checkpoints, exits, or collectibles.
The drawing does not need to look attractive. Its purpose is to answer structural questions:
Where does the player begin? What can they see from the starting position? Where is the main route? Are there optional areas? Where does the level become more difficult?
Think about how the player moves between important spaces. A completely straight route can feel repetitive, while too many branches may create confusion. Optional paths work best when they offer a clear reward, such as a collectible, shortcut, upgrade, or story detail.
Use landmarks to support orientation. A tower, unusual tree, glowing doorway, or large statue can help players understand where they are and where they should go. Wayfinding includes both recognising your position and navigating toward a destination.
Remember that a drawing is only a hypothesis. A layout can help organise ideas, but it cannot prove that the level works. Only a playable blockout and actual testing can do that.
Plan the Level’s Pacing
Pacing is the rhythm created by challenges, exploration, discovery, and rest. A level filled with constant danger may become exhausting, while long sections without meaningful decisions can feel empty.
Divide the experience into short beats. A basic action level might use this structure:
- Safe introduction
- Small challenge
- Exploration or reward
- More difficult combination
- Brief recovery
- Final test
- Exit or story moment
The exact pattern depends on the game. A puzzle level may alternate between observation and problem-solving, while a shooter may switch between combat arenas and quieter navigation sections.
Consider how each section causes the next one. The player might cross a bridge because they see a locked gate, search for a switch because the gate is closed, and then return through a new enemy encounter after activating it.
A pacing plan should identify what happens, which sections matter most, and why activities occur in a particular order.
Avoid increasing difficulty only by adding more enemies. Combine mechanics in new ways, reduce available space, change timing, or ask the player to make a more interesting decision.
Prepare a Simple Blockout in GameMaker
Once the paper plan makes sense, build a rough version in GameMaker. Use plain blocks, temporary sprites, or basic tiles instead of final artwork.
A blockout is a rough playable draft used to test the level’s basic shapes, routes, dimensions, and gameplay. Its purpose is to make structural changes cheap and fast before polished assets create extra work.
GameMaker’s Room Editor supports layers for instances, tile maps, paths, backgrounds, and visual assets. Organising these elements separately makes the level easier to edit and understand.
You could begin with layers named:
Background
GroundTiles
Collision
Enemies
Pickups
Foreground
Use objects for interactive elements and tiles for large areas of static scenery. GameMaker tile sets divide an image into grid-based cells that can be painted onto tile-map layers, making them practical for constructing platforms, floors, walls, and backgrounds.
Do not decorate yet. Run through the level repeatedly and adjust platform spacing, room dimensions, enemy locations, and checkpoint placement first.
Plan the Camera, Guidance, and Playtesting
The camera determines how much information the player can see. A challenge that works with a wide view may become unfair when an enemy or landing platform is outside the visible area.
Sketch the camera boundaries alongside the level. Give players enough time to notice and react to hazards. In a fast platformer, the camera may look slightly ahead, while a slower exploration game may keep the character near the centre.
GameMaker separates cameras, which define what part of the room is viewed, from viewports, which define where that view appears in the game window.
After the blockout works for you, ask someone unfamiliar with the layout to play it. Do not immediately explain the objective or controls. Observe where they stop, miss a route, fail repeatedly, or misunderstand an object.
When several players make the same mistake, consider changing the design before assuming they simply need more skill. Move the camera, improve the landmark, adjust the spacing, simplify the encounter, or provide a safer introduction.
Repeat this process before adding final artwork. Polishing an untested layout only makes future changes slower and more expensive.
Planning a 2D game level starts with defining its purpose, understanding the player’s abilities, and measuring how those abilities work inside the game world.
A simple route sketch and pacing plan can then organise challenges, rewards, optional paths, and recovery moments. The plan should quickly become a playable blockout.
Temporary graphics make it easier to test platform spacing, camera behaviour, enemy placement, navigation, and difficulty without becoming attached to unfinished ideas.
Before building your next detailed GameMaker room, write one sentence describing its purpose and sketch its main route.
Create a rough version, let another person play it, and revise what causes confusion. Strong levels are rarely built perfectly on the first attempt; they become enjoyable through focused testing and iteration.