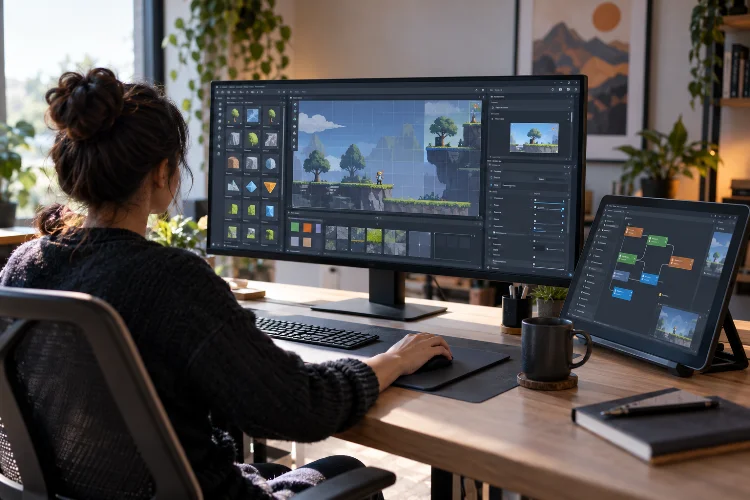
Opening GameMaker for the first time can feel a little like walking into a new studio where every tool is already sitting on the desk-but you are not quite sure what any of them do.
There are buttons across the top, panels on the sides, an Asset Browser, editor windows, output messages, and a large central area where different parts of your project suddenly appear.
At first glance, the interface may seem more complicated than the games you actually want to create.
That feeling usually disappears quickly once you understand how GameMaker organizes its development environment.
Understanding the GameMaker Start Page and Workspace is an important first step because these areas become the central hub for almost everything you do.
You will use them to create projects, organize sprites and objects, edit rooms, write code, test builds, and move between different game-development tasks.
This guide breaks the interface into simple pieces so you can navigate GameMaker with confidence instead of randomly clicking around.
1. What Is the GameMaker Start Page?
The Start Page is essentially the entry point to GameMaker.
When you launch the IDE, this screen provides access to project creation, existing projects, recent work, account information, version details, and official learning resources. GameMaker also provides a Setup Wizard that can guide new users through creating their first project.
Think of the Start Page as the lobby of your development environment. You normally will not spend hours there, but it helps you quickly decide where you want to go.
You can create a completely new game, open an existing project, or import supported project files.
The Recent Projects section is especially useful once you start working regularly. Instead of browsing through folders every time, you can quickly reopen projects you have recently edited.
Choosing a Project Template
When creating a game, GameMaker lets you choose a project type and template.
For example, the current Start Page includes both Blank Game and Blank Pixel Game templates. The pixel-oriented option disables colour interpolation so pixel-art graphics remain sharp instead of being visually smoothed.
Beginners usually benefit from a blank project because it lets them learn how assets connect without having to understand someone else’s existing structure.
2. Moving From the Start Page Into the Workspace
Once you open or create a project, GameMaker takes you into the Workspace.
The Workspace is the main area where actual development happens. It is where you open assets, edit objects, write scripts, design rooms, inspect properties, and move between different parts of your project.
A useful way to imagine it is as a very large digital desk.
When you open a sprite, its editor appears on that desk. Open an object, and another editor can appear beside it. Open code associated with that object and you can arrange those windows around the same working area.
Unlike IDEs that force everything into a rigid layout, GameMaker allows you to move and organize many windows according to your workflow.
That flexibility might feel strange initially, but it becomes extremely useful as projects grow.
3. Understanding the Asset Browser
One of the most important areas of the GameMaker interface is the Asset Browser, which is normally positioned on the right side of the IDE.
This is where the building blocks of your game live.
Sprites, objects, rooms, sounds, scripts, shaders, fonts, sequences, paths, and other game resources can be created and organized here. A new GameMaker project currently includes the room required for the project to run, while additional assets can be added as you need them.
Suppose you are creating a simple platform game.
You might eventually have assets such as:
spr_player
obj_player
spr_enemy
obj_enemy
rm_level01
These assets can then be placed into folders or groups so the project remains managable.
GameMaker does not force you to organize folders purely by asset type. You could create folders for characters, levels, user interfaces, or different gameplay systems instead.
Search, Filters, and Quick Access
The Asset Browser becomes even more valuable in larger projects.
Its search bar can filter assets by name, while filtering tools can narrow the list according to asset type or tags. GameMaker also provides Quick Access areas for recent assets, favourites, room order, saved searches, tags, and project options.
Imagine having 500 assets in a project. Scrolling through all of them every time would be frustrating.
Searching for enemy, filtering by object type, or marking commonly edited resources as favourites can dramatically reduce navigation time.
4. How Editor Windows Work Inside the Workspace
Double-clicking an asset usually opens the editor associated with that asset.
A sprite opens in the Sprite Editor. A room opens in the Room Editor. An object opens its object-related interface, while scripts and events can open code-editing windows.
This means the Workspace constantly changes depending on what you are doing.
If you are designing a level, most of your attention may be focused on the Room Editor. Five minutes later, you might move into an object’s event and spend your time writing GML code.
You can keep multiple resources open rather than repeatedly closing one before opening another.
For example, when programming enemy movement, you might keep the enemy object, player object, shared scripts, and room layout available at the same time.
Once this behaviour becomes familair, moving around GameMaker starts feeling much faster.
5. Using Multiple Workspaces for Better Organization
GameMaker is not limited to a single Workspace.
You can create additional workspace tabs inside the same project and even rename them. The official documentation suggests using separate workspaces for different groups of related assets-for example, one for the player and another for enemy objects.
This becomes especially helpful when your project grows.
You could create:
Gameplay Workspace for player and enemy logic.
UI Workspace for menus and interface objects.
Level Design Workspace for rooms and environment assets.
Systems Workspace for inventory, saving, dialogue, or global scripts.
You can also drag a Workspace tab into its own window, which is useful when working with multiple monitors. One screen could contain your Room Editor while another shows scripts or object properties.
The goal is not to create dozens of workspaces. It is simply to reduce clutter and keep related tasks together.
6. What the Inspector Does
Another important part of the IDE is the Inspector.
The Inspector displays properties for whichever supported element you currently have selected. Instead of opening a completely separate settings window for every small adjustment, you can often modify relevant properties directly through this panel.
For example, selecting certain assets or editor elements can expose properties that you can immediately change.
Think of it as a contextual control panel.
Its contents change depending on what you are working with, which is why beginners sometimes think options have suddenly disappeared. Usually, nothing is missing—you simply selected something different.
Learning to glance at the Inspector whenever you select an asset can make GameMaker feel much more intuitive.
7. Understanding the Output Window
The panel at the bottom of GameMaker is not just technical clutter. It is one of your most useful troubleshooting tools.
The Output Window can display compiler information, debugging messages, search results, source-control output, breakpoints, syntax errors, compile errors, and Feather messages depending on the relevant tab.
When you test your game and something fails, this is one of the first places you should look.
For example, if your GML contains a syntax mistake, GameMaker can list the error and its location. You can then double-click an error entry to navigate toward the related code.
You can also intentionally send information to the Output log through debugging functions such as show_debug_message().
That makes the window useful even when your game does not crash.
If a character’s health should equal 75 but behaves strangely, printing the health variable to the output can help you understand what is actually happening during runtime.
8. Customizing and Docking the GameMaker Workspace
GameMaker’s layout is highly customizable.
Windows such as the Asset Browser can be undocked and moved into floating windows, then docked again along the edges of the IDE. GameMaker remembers docked windows between sessions, allowing you to build a layout that matches your working style.
This is particularly useful if you have a large monitor.
You might keep your Asset Browser narrow on the right, Inspector on the left, code in the center, and Output Window along the bottom.
Someone using a smaller laptop may prefer hiding panels occassionally to create more space for coding or room design.
There is no single perfect layout.
The best Workspace is simply one that helps you reach important information quickly without covering the content you are currently editing.
GameMaker also provides extensive IDE Preferences where you can customize areas including the Start Screen, Asset Browser, Inspector, editors, language settings, Feather, keyboard controls, and other development features.
9. Navigation Tricks That Save Time
As your game expands, efficient navigation becomes increasingly important.
One useful feature is the Go To window. GameMaker lets you search through assets, functions, Game Options, and Preferences from this interface. The default keyboard shortcut is Ctrl + T on Windows or Command + T on macOS.
Instead of digging through folders to find obj_player, you can simply open Go To, type part of the name, and jump directly to it.
GameMaker also provides quick buttons along the top of the IDE for common tasks such as saving, testing the game, debugging, creating executable builds, opening Game Options, clearing the compiler cache, and accessing documentation.
You do not need to memorize every shortcut immediately.
Start with the tools you use regularly and learn the rest seperately as your workflow becomes more advanced.
10. A Simple Workspace Strategy for Beginners
When starting your first project, resist the temptation to customize everything immediately.
Use the default layout for a while.
Create a sprite, create an object, open the Room Editor, add the object to the room, and run the project. Pay attention to where each resource opens and how the Inspector, Asset Browser, Workspace, and Output Window respond.
Once the layout starts feeling natural, make small improvements.
Organize assets into logical folders. Favourite commonly used resources. Create an additional Workspace when the first one becomes crowded, and use search rather than scrolling through long asset lists.
These simple habits scale surprisingly well.
A project containing ten assets does not require sophisticated organization. A project containing hundreds of sprites, objects, scripts, rooms, sounds, and sequences absolutely does.
Understanding the GameMaker Start Page and Workspace gives you a strong foundation for everything that comes next in GameMaker development.
The Start Page helps you create, open, and manage projects, while the Workspace becomes your main development environment.
Inside it, tools such as the Asset Browser, Inspector, editor windows, Output Window, multiple workspaces, and navigation features help you organize and build your game efficiently.
You do not need to master the entire IDE before creating something playable. Learn the interface gradually while actually building.
Create a small project, open a few assets, rearrange your Workspace, run the game, and watch the Output Window. After a little hands-on practice, the interface that initially looked complicated will start to feel like a familiar development toolkit.