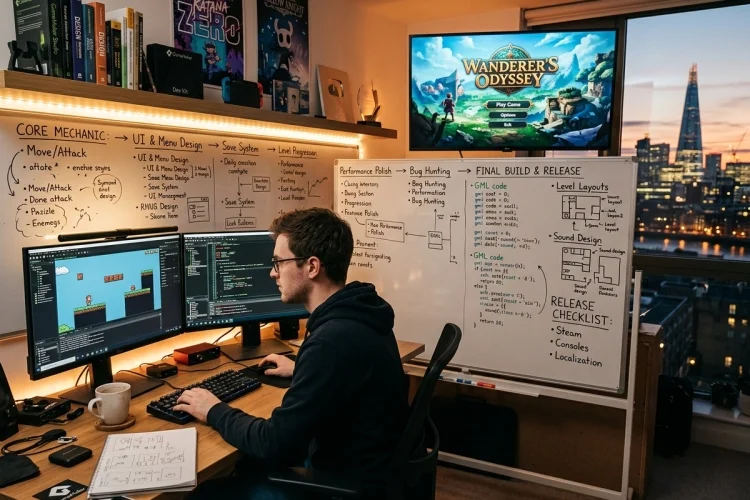
Getting a GameMaker prototype working can feel like a major victory. The character moves, enemies react, collisions function, and the main mechanic is finally playable.
However, a working prototype is not the same as a complete game. A prototype answers one important question: is the central idea enjoyable? A finished game must answer many more.
Can new players understand it? Does it save progress correctly? Are menus clear? Does performance remain stable across every room? Can players recover from errors without restarting the entire application?
Learning how to turn a GameMaker prototype into a complete game requires more than adding extra levels. You need to control the project’s scope, organise the code, develop content efficiently, test unusual situations, improve performance, and prepare a proper release build.
The transition can feel overwhelming, especially for solo developers. Breaking the process into clear production stages makes it much more manageable.
Decide What the Finished Game Actually Includes
Before expanding the prototype, define what “complete” means for this particular project. Without a fixed target, every new idea can become another feature that delays release.
Write down the essential experience. A small arcade game may need one polished gameplay mode, several enemy types, a scoring system, difficulty progression, menus, sound, and a restart loop.
It may not need online multiplayer, character customisation, or a large narrative campaign.
Separate features into three groups: essential, useful, and optional. Essential features are required for the game to function. Useful additions improve the experience, while optional ideas can be removed without damaging the core concept.
Be strict with the optional category. Finishing a focused five-level game is more valuable than building half of an ambitious fifty-level project.
Prove the Core Loop with a Vertical Slice
A prototype usually demonstrates one mechanic in a temporary environment. The next useful milestone is a vertical slice: one short section that represents the expected quality of the finished game.
For example, a platformer vertical slice might include one polished level, final-style artwork, music, sound effects, enemies, checkpoints, menus, and a clear ending. It does not need the complete amount of content, but it should show how the final pieces work together.
This stage reveals hidden production problems. You may discover that each enemy animation takes too long to create, the camera does not work in small rooms, or the save system cannot handle changing levels.
Complete the vertical slice before producing twenty more stages. Fixing a structural problem once is much easier than fixing it across the entire game.
Refactor the Prototype Before Expanding It
Prototype code is often written quickly. It may contain repeated logic, temporary variables, hard-coded values, and objects with too many responsibilities.
Clean up the most fragile areas before adding large amounts of content. Move reusable logic into functions, organise assets into clear groups, and replace names such as object7 or value2 with descriptive alternatives.
Do not rewrite the entire game simply because the code is imperfect. Refactor the parts that regularly cause bugs, block new features, or make changes unusually difficult.
Start using source control as early as possible. GameMaker supports Git-based source-control workflows, which can help track changes and restore earlier versions when a refactor breaks the project.
Make small commits with meaningful descriptions such as “Add checkpoint saving” or “Refactor enemy damage handling.” This creates a much clearer project history than one enormous weekly update.
Build a Repeatable Content Pipeline
A complete game normally needs more levels, enemies, dialogue, items, sounds, and interface assets than the original prototype. Producing this content without a consistent process can become slow and chaotic.
Create reusable templates. An enemy parent object can provide shared health and damage behaviour, while child objects change statistics, sprites, or attacks. A standard room structure can include the same camera controller, interface layers, and transition objects.
Use data instead of duplicating entire systems where practical. Several weapons might share one combat system while using different damage, range, cooldown, and sprite values.
Set small production milestones. Rather than aiming to “finish the game,” aim to complete the first three levels, then all enemy behaviours, followed by menus and save functionality.
Track when content is genuinely finished. A level is not complete simply because it can be played from beginning to end. It should also have working collisions, final objectives, checkpoints, audio, appropriate difficulty, and no known progression-blocking bugs.
Add the Systems a Prototype Usually Ignores
Prototypes often skip everything that happens before and after the main gameplay. A complete game must support the entire player journey.
Most projects need a title screen, pause menu, settings, level transitions, failure handling, and a way to return to the game after closing it. Depending on the genre, you may also need tutorials, checkpoints, controller support, subtitles, adjustable volume, and remappable controls.
Saving deserves special attention. GameMaker’s older game_save() approach is deprecated, and the documentation recommends creating a custom save system with file or buffer functions so that you control which data is stored.
Do not wait until the final week to build these systems. Saving, pausing, and room transitions can affect the project’s architecture, so test them while the game is still flexible.
Consider failure states as carefully as success states. What happens if a save file is missing, an expected instance does not exist, or the player closes the game during a transition?
Test the Game Beyond the Intended Route
Developers naturally play their own games correctly. Real players will press buttons at unexpected times, revisit old rooms, pause during animations, and combine mechanics in ways you never planned.
Test each feature in isolation before testing the complete experience. Check movement at room edges, collisions at high speeds, multiple enemies attacking simultaneously, and menus opened during unusual states.
GameMaker’s Debugger allows you to pause execution, inspect variables, use breakpoints, and follow the call stack. These tools are more reliable than guessing where a complicated problem begins.
Keep a bug list with steps for reproducing each issue. “The boss sometimes breaks” is difficult to investigate. “Pausing during the second attack causes the boss timer to remain at zero” gives you a useful starting point.
Invite people who have never seen the project to play it. Watch where they become confused instead of immediately explaining what to do.
Optimise Based on Evidence
Poor performance is not always caused by the most complicated-looking code. Avoid spending hours optimising systems that have little measurable effect.
Test rooms containing the largest number of instances, effects, enemies, and interface elements. Pay attention to frame rate, loading times, memory use, and target-specific behaviour.
GameMaker’s Profiler shows which events, scripts, and functions consume execution time. This helps identify expensive code instead of relying entirely on assumptions.
Common improvements include reducing unnecessary Step Event checks, deactivating distant instances, limiting particle counts, avoiding repeated resource creation, and simplifying expensive collision queries.
Optimisation should preserve the game’s behaviour. Make one change at a time, measure the result, and confirm that it has not created a new gameplay problem.
Add Polish Where Players Notice It
Polish is not simply adding more visual effects. It is the process of making actions feel clear, responsive, and intentional.
Focus first on frequent interactions. Movement, jumping, attacking, collecting items, receiving damage, and navigating menus deserve more attention than a rare background animation.
Improve feedback through animation, sound, particles, screen movement, colour changes, and timing. A successful hit should look and sound different from a missed attack.
Polish also includes consistency. Buttons should behave the same way across menus, sound levels should remain balanced, and transitions should not change style without a reason.
Do not use effects to hide weak gameplay. A mechanic that feels confusing without particles will probably remain confusing after particles are added.
Prepare and Test the Release Build
Running a project inside the GameMaker IDE is not the same as testing the version players will receive. Create executable packages regularly during the final development stage.
GameMaker distinguishes between compiling for testing and compiling a final executable package for a target platform. The Build menu provides options for testing, debugging, cleaning cached files, and creating executable builds.
Test the packaged game on another computer or device. Confirm that included files load correctly, save data is written to the expected location, controls work, and the application closes without errors.
Complete the platform-specific game options, including the product name, version, icons, application identifiers, and display settings. Different targets may also require store assets, permissions, certificates, or platform approval.
Treat the first public version as a release candidate, not an automatic final build. Test it from installation to ending before uploading it to players.
Turning a GameMaker prototype into a complete game requires a shift from experimentation to production. Define the final scope, prove the experience with a vertical slice, clean up fragile code, and create a repeatable way to produce content.
A finished game also needs systems that prototypes often ignore, including menus, saving, settings, failure handling, testing, and release packaging.
Use the Debugger and Profiler to solve problems based on evidence, then focus polish on the actions players experience most often.
Choose one unfinished prototype and write down the smallest complete version you could realistically release. Build one polished slice, test it with new players, and use what you learn to guide the rest of production.