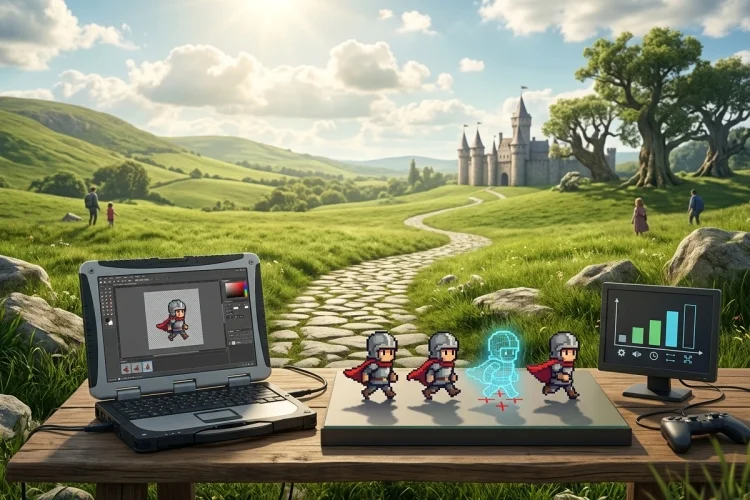
When you look at a 2D game, nearly everything visible may begin as a sprite. The hero running across the screen, a spinning coin, an enemy waiting behind a wall, and even a menu button can all use sprite assets.
However, sprites in GameMaker do more than display pictures. They can contain multiple animation frames, provide collision boundaries, define an object’s visual position, and change dynamically while the game is running.
Understanding how sprites work in GameMaker is therefore an essential skill for new developers. A poorly positioned origin can make a character jump when turning around, while an inaccurate collision mask can cause players to hit invisible walls.
Animation settings can also make movement look either smooth or strangely fast. This guide explains the main parts of a GameMaker sprite, including frames, origins, collision masks, animation speed, and useful GML properties.
By learning how these elements work together, you can create cleaner animations, more reliable collisions, and better-looking 2D games.
What Is a Sprite in GameMaker?
A sprite is an image asset used to represent something visually inside a GameMaker project. It may show a player, enemy, weapon, collectible, background decoration, interface element, or almost anything else that needs to appear on the screen.
A sprite can contain one static image or multiple sub-images called frames. When GameMaker displays those frames in sequence, they create animation. A four-frame character sprite, for example, might show four slightly different stages of a walking cycle.
Sprites are normally created and managed through the Sprite Editor. This editor lets you import or draw images, adjust their dimensions, set animation speed, choose an origin, and configure a collision mask.
GameMaker also supports more specialised visual formats, but most beginner projects use regular bitmap sprites made from pixels.
Sprites, Objects, and Instances Are Different
One of the most common beginner mistakes is treating a sprite and an object as the same thing. They are connected, but they perform different jobs.
A sprite controls appearance. An object contains behaviour, events, variables, and other gameplay rules. When you place a copy of an object inside a room, that copy becomes an instance.
Imagine that you are creating a coin. The asset spr_coin might contain its spinning animation, while obj_coin contains the code that increases the score when the player touches it. Every coin placed in the room is a separate instance of obj_coin.
Assigning a sprite to an object allows GameMaker to draw that sprite automatically unless you replace the default drawing behaviour with custom Draw Event code. Sprite-related instance variables can then control the visible frame, scale, rotation, colour, and animation speed.
A clear naming convention can help keep these assets organised:
spr_player
obj_player
spr_enemy_walk
obj_enemy
The prefixes are optional, but they make large projects much easier to navigate.
How to Create and Import a Sprite
To create a sprite, open the Asset Browser, choose Create Sprite, and give the new asset a descriptive name.
You can then open the Image Editor to draw artwork directly inside GameMaker or import an image created in another program. Image files can also be dragged into the GameMaker workspace to create sprite assets.
PNG is commonly used for 2D artwork because it supports transparent backgrounds. Transparency allows a character or item to appear without a solid rectangular box surrounding it.
When importing an animation strip or a collection of frames, make sure every frame has consistent dimensions. If one frame is positioned differently from the others, the character may appear to shake even when its object remains in the same place.
For pixel art, avoid resizing images carelessly. Scaling a small sprite with inappropriate filtering may produce blurry edges. It is usually better to create artwork at the intended resolution or enlarge it by whole-number amounts.
Before continuing, preview the animation inside the Sprite Editor. Check that the frame order is correct, the character remains aligned, and no frame contains unwanted transparent space.
How Sprite Frames Create Animation
An animated sprite contains two or more frames. GameMaker cycles through those frames according to the animation speed set in the Sprite Editor and the instance’s image_speed value.
The built-in variable image_index stores the currently displayed frame. Frame counting starts at zero, so a sprite with four frames generally uses indices 0, 1, 2, and 3.
You can select a specific frame with GML:
image_index = 0;
This is useful for displaying an idle frame, changing a button state, or showing a particular stage of an object.
The image_speed variable acts as a multiplier for the animation speed configured in the Sprite Editor. A value of 1 uses the normal speed, 0.5 plays at half speed, 2 plays twice as fast, and 0 pauses the animation.
if (move_x == 0 && move_y == 0)
{
    image_speed = 0;
    image_index = 0;
}
else
{
    image_speed = 1;
}
This example pauses a walking animation while the character is standing still. Instead of creating a new sprite, it uses the first frame as the idle image.
Why the Sprite Origin Matters
The origin is the anchor point used to position a sprite. When an instance is placed at an x and y coordinate, GameMaker places the sprite’s origin at that exact location.
The default origin may be at the top-left corner, but that is not always the best choice. A player in a top-down game often works well with a centre origin, while a platform character may benefit from a bottom-centre origin aligned with its feet.
Consistent origins are especially important when switching between sprites:
if (speed == 0)
{
    sprite_index = spr_player_idle;
}
else
{
    sprite_index = spr_player_walk;
}
If spr_player_idle uses a centre origin and spr_player_walk uses a top-left origin, the character will appear to jump when the sprite changes.
Origins also affect rotation and scaling. When a sprite rotates, it turns around its origin. A sword may therefore need its origin near the handle rather than in the middle of the image.
Choose the origin according to how the asset will move, rotate, align, and interact with the world-not simply according to what looks centred in the editor.
How Sprite Collision Masks Work
A collision mask defines the area GameMaker uses when checking whether an instance touches something else. It does not need to match every visible pixel exactly.
GameMaker offers several mask shapes, including rectangles, rotated rectangles, ellipses, diamonds, and precise masks. Rectangular masks are generally the fastest to resolve, while precise per-frame masks require much more collision-processing work.
For most players and enemies, a simple rectangular mask is more stable than a precise outline. A slightly smaller mask can also make movement around walls feel less frustrating.
Consider a character with animated hair or a swinging weapon. If every visible pixel becomes part of the collision boundary, the character may collide with objects because of decorative movement rather than its actual body.
GameMaker can calculate the bounding box automatically based on image transparency, or you can define it manually. The alpha tolerance setting controls how transparent pixels influence automatic mask generation.
You can also assign a separate sprite as the collision mask through mask_index. This allows an object to change its visible animation without constantly changing its collision shape.
Controlling Sprites with GML
GameMaker provides several built-in variables for changing how an instance’s sprite appears.
The sprite_index variable changes the assigned sprite:
sprite_index = spr_player_attack;
The image_xscale and image_yscale variables control horizontal and vertical scale. A common technique is to flip a side-facing character by changing its horizontal scale:
if (move_x != 0)
{
    image_xscale = sign(move_x);
}
The image_angle variable rotates the sprite, while image_alpha controls transparency. You can also use image_blend to apply a colour tint.
image_angle += 2;
image_alpha = 0.75;
These changes affect the instance rather than permanently modifying the original sprite asset. Two instances using the same sprite can therefore have different sizes, rotations, colours, or animation frames.
Remember that custom Draw Event code may replace GameMaker’s automatic sprite drawing. When using functions such as draw_sprite_ext(), you need to pass the appropriate sprite, frame, position, scale, angle, colour, and alpha values yourself.
Practical Sprite Tips for Better Games
Keep sprite dimensions and origins consistent across related animations. An idle, walking, attacking, and damaged sprite for the same character should align around the same physical reference point.
Use descriptive names instead of labels such as sprite1 or new_sprite. Names like spr_slime_idle and spr_slime_attack make code easier to read and reduce the chance of selecting the wrong asset.
Collision masks should represent gameplay needs rather than artwork details. Test them in narrow corridors, corners, slopes, and other areas where inaccurate boundaries become noticeable.
You should also avoid using extremely large images when a smaller asset would provide the same visual result.
GameMaker places image resources onto texture pages, and organised texture groups can reduce unnecessary texture-page switching in some projects and target environments.
Most importantly, preview and test every sprite in the actual game. An animation that looks smooth inside the editor may feel too fast once combined with movement, sound, and player input.
Common Sprite Mistakes to Avoid
A character that appears to wobble usually has misaligned frames or inconsistent origins. Open the animation and compare the character’s position across every frame.
Unexpected collisions often come from an automatic mask that includes transparent edges, weapons, hair, or visual effects. Switch to a manual rectangle and adjust its bounds around the important physical area.
An animation that refuses to play may have image_speed set to zero. It may also be repeatedly reset to frame zero by code running in every Step Event.
Finally, remember that changing sprite_index can also change the active collision mask unless the object uses a separate mask_index.
Test one change at a time. Sprite problems become much easier to diagnose when animation, drawing, scaling, and collision code are not all changed simultaneously.
Sprites are the visual foundation of most 2D GameMaker projects, but their role extends beyond simple images. They contain animation frames, define anchor points, contribute to collision detection, and can be transformed dynamically through GML.
Understanding sprite_index, image_index, image_speed, origins, and collision masks will help you avoid many common beginner problems.
Consistent alignment produces smoother animation, while practical collision boundaries make movement feel fair and responsive. Create a simple sprite with four frames and assign it to an object.
Experiment with pausing the animation, changing frames through code, moving the origin, and adjusting the collision mask. Learning through a small test project is the fastest way to understand how GameMaker sprites behave.