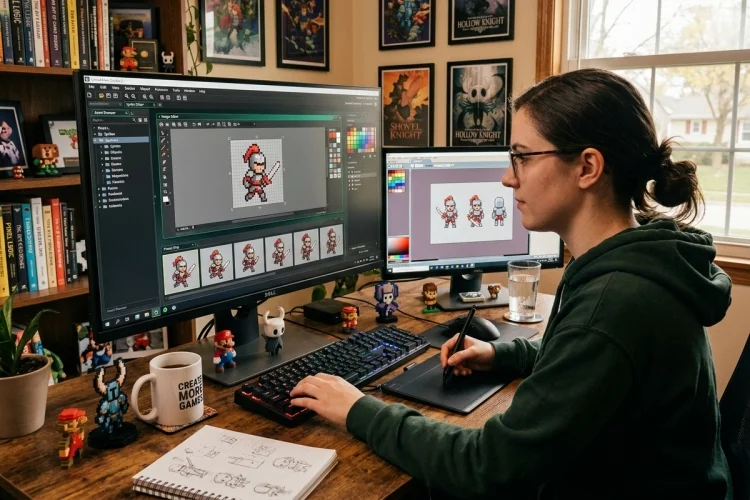
Great 2D games do not always need complicated artwork. A small character made from a few carefully placed pixels can feel memorable when it moves smoothly, reacts clearly, and fits the visual style of the game.
In GameMaker, these images are usually stored as sprites. A sprite can represent a player, enemy, collectible, projectile, interface icon, environmental object, or animated effect. It may contain one static image or several frames that play as an animation.
Learning how to icon, environmental object, or animated effect. It may contain one create and edit sprites in GameMaker is therefore an important early step for any beginner.
The built-in Sprite Editor and Image Editor let you import artwork, draw directly inside the engine, organise image layers, create animation frames, and configure gameplay-related properties.
This guide walks through the complete process, from creating your first sprite asset to adjusting animation speed, origins, and collision masks. You will also learn practical ways to keep your artwork clear, consistent, and easy to use in a growing GameMaker project.
Create a New Sprite Asset
Open your GameMaker project and look at the Asset Browser. Right-click an empty area or the relevant asset group, then select Create Sprite. The new asset will open ere its main properties can be configured.
Give the sprite a descriptive name such as:
spr_player_idle
GameMaker asset names can contain letters, numbers, and underscores, but they cannot begin with a number. A prefix such as spr_ is optional, although it makes sprites eaproject contains many different resources.
Avoid vague names such as sprite1, image_new, or character2. A name like spr_slime_walk immediately tells you what the asset contains and where it may be used.
You can also set the sprite dimensions before drawing. For a basic pixel-art character, you might begin with a canvas measuring 32 × 32 or 64 × 64 pixels. Larger artwork can provide more detail, but it also requires more drawing time and texture memory.
Draw a Sprite in the Image Editor
Click Edit Image to open GameMaker’s Image Editor. This workspace includes common drawing features such as pencils, brushes, shapes, fills, selections, colour controls, and erasing tools.
If you have used a basic graphics editor before, many controls will feel familiar. One useful difference is that the Image Editor is connected directly to the sprite asset, so saved changes can appear immediately when you test the game.
Start with a rough silhouette rather than adding tiny details immediately. A strong silhouette helps the player understand the character’s shape even when it appears small on the screen.
Work with image layers
The Image Editor supports multiple layers for each sprite. You could place the body on one layer, clothing on another, and highlights or shadows nd grouped into folders.
This makes editing much easier. If you decide to change the character’s shirt colour, you can modify that layer without repainting the face or outline.
Keep the number of layers practical. A sprite with dozens of unnecessary layers may become difficult to manage, especially when every animation frame needs similar edits.
Import Existing Artwork
You do not have to draw every sprite inside GameMaker. Artwork created in applications such as Aseprite, Photoshop, Krita, or another image editor can be imported into the Sprite Editor.
PNG is a common choice for 2D sprites because it supports transparency. Transparent areas allow the character or object to appear without a coloured rectangle around it.
Use the Import button in the Sprite Editor or the import option inside the Image Editor. You can also drag supported image files directly from yo create sprite assets.
When importing several separate images, select them together so GameMaker can add them as animation frames. Make sure each file has the same dimensions and that the subject is positioned consistently.
For example, a walking animation may contain:
player_walk_01.png
player_walk_02.png
player_walk_03.png
player_walk_04.png
If the character’s feet are positioned differently in each image, the animation may appear to shake even when the object itself is moving smoothly.
Build an Animated Sprite
An animated sprite contains multiple frames, also known as sub-images. GameMaker displays these frames in sequence to create the illusion of movement.
Inside the Image Editor, use Add Frame to create another frame. You can duplicate an existing image and modify it slightly rather than redrawing the character from scratch.
Onion skinning can display earlier or later frames as semi-transparent references beneath the current image. This is especially helpful when creating walk cycles, attacks, explosis that need smooth movement between poses.
You can drag frames along the timeline to change their order. The preview controls allow you to play the sequence and check whether the movement feels natural.
Import a sprite strip
A sprite strip places all animation frames side by side inside one long image. GameMaker can divide that image into separate frames during import.
A filename such as:
player_walk_strip6.png
indicates that the image contains six frames. GameMaker uses the mage should be divided.
Every section of the strip should have equal dimensions. If a 192-pixel-wide strip contains six frames, each frame should be 32 pixels wide.
Sprite strips can make exporting artwork from external animation software faster, but clear file naming is important.
Set the Animation Speed
The Sprite Editor allows you to choose how quickly the animation should play. Animation speed can be measured in frames per second or frames per game frame.
Frames per second is usually easier for beginners to understand. For example, an animation speed of eight frames per second attempts to display eight sprite frames every second.
Do not assume that a faster animation is automatically better. A heavy character may need a slow walk cycle, while a small flying enemy may look more energetic with rapid movement.
You can also control the animation while the game is running with the built-in image_speed variable:
image_speed = 1;
A value of 1 uses the sprite’s configured speed. A value of 0.5 plays it at half speed, while image_speedto0` pauses the animation.
For example, a player object could pause its walking animation when standing still:
if (move_x == 0 && move_y == 0)
{
    image_speed = 0;
    image_index = 0;
}
else
{
    image_speed = 1;
}
This displays the first frame while the character is idle and resumes the animation when movement begins.
Choose the Correct Sprite Origin
The origin is the anchor point that connects the sprite image to an instance’s position. If an instance is placed at x = 200te’s origin is drawn at those coordinates.
A centre origin works well for many top-down characters, projectiles, and rotating objects. A bottom-centre origin may be more useful for platform characters because it aligns the position with the character’s feet.
Origins should remain consistent across related animations. If an idle sprite uses a centre origin but the walking sprite uses a top-left origin, the character may suddenly jump when the sprite changes.
The origin also controls rotation and scaling. A sword should rotate around its handle, while a door may need its anchor placed near the hinges.
Test the origin inside an actual room rather than relying only on the Sprite Editor preview. Its effect becomes much clearer when the object moves, turns, or changes animation.
Configure the Collision Mask
A collision mask determines which part of the sprite GameMaker uses for collision checks. By default, new sprites commonly use a rectangumask shapes to resolve.
The collision mask does not always need to follow the visible artwork exactly. A character with large hair, a cape, or a weapon may feel frustrating if every decorative pixel can hit a wall.
For many characters, a smaller rectangular mask around the body or feet produces smoother movement. Precise masks can follow transparent pixels more closely, but they are not always necessary and may create inconsistent collisions across animation frames.
GameMaker can calculate the mask automatically using the sprite’s transparency. Youe and shape manually in the Sprite Editor.
Test the result around narrow passages and corners. A collision mask that appears reasonable in the editor may still feel too large or too small during gameplay.
Polish and Organise Your Sprites
Consistency matters more than extreme detail. Related sprites should use similar dimensions, colour choices, outline thicknesses, lighting directions, and origins.
Preview every animation at the size it will appear in the game. Pixel art that looks clear when enlarged may become difficult to read at its actual resolution.
Keep transparent space around each frame to a minimum. Excessive empty space can make alignment harder and waste room on texture pages.
You should also separate sprites by purpose in the Asset Browser. For example, create groups for players, enemies, environment art, interface elements, and visual effects.
Before considering a sprite finished, check four things: frame alignment, animation timing, origin placement, and collision shape. These details often have a greater effect on gameplay quality than adding more visual decoration.
Common Sprite Editing Mistakes
A shaking animation is usually caused by inconsistent frame positioning. Compare every frame and make sure important reference points, such as the feet or body centre, stay aligned.
Blurry pixel art often results from resizing small images with smoothing or using non-integer scaling. Create pixel art at its intended resolution and scale it by whole values whenever possible.
Unexpected collisions may come from an automatic mask that includes effects, weapons, or transparent edges. Replace it with a simpler manual shape that represents the object’s physical body.
Finally, avoid editing all frames independently when they share major features. Duplicate a clean base frame, use layers, and apply consistent changes. This saves time and reduces visual errors.
Creating and editing sprites in GameMaker involves more than drawing an attractive image. You also need to organise frames, choose suitable animation timing, set a reliable origin, and create a collision mask that supports smooth gameplay.
GameMaker’s Sprite Editor and Image Editor provide enough tools to draw basic artwork, import external images, work with layers, build animations, and preview the results without leaving the engine.
Features such as onion skinning and sprite-strip importing can make animation work much faster. Create a simple four-frame character animation and test it inside a room.
Adjust its speed, origin, and collision mask until it feels right. That small exercise will give you the foundation needed to create polished characters, enemies, items, and effects for a complete 2D game.